Life should not be a journey to the grave with the intention of arriving safely in an attractive and well preserved body, but rather to skid in sideways, chocolate in one hand, martini in the other, totally worn out and screaming,
"WOO HOO, what a ride!"

Showing posts with label crafts. Show all posts

Saturday, March 16, 2013

Saturday Snapshots

 Saturday Snapshot is hosted by At Home with Books. To participate in this meme post a photo that you (or a friend or family member) have taken then leave a direct link to your post in the Mister Linky. Photos can be old or new, and be of any subject as long as they are clean and appropriate for all eyes to see. How much detail you give in the caption is entirely up to you. Please don't post random photos that you find online.
~~~~~~~~~~~~
My friend is a Harry Potter fiend and I had fun making her some recent Christmas crafts. The creative ideas are endless so I've had fun making some more. I've been wanting to try painting mugs and saw some terrific ideas on Pinterest that I modified a bit. My new Sharpie markers are so easy to use but not as effective as paint markers. I got one package of markers as a gift and bought another on sale and had a coupon so the total for 30 Sharpies was $1.00!! Each mug was also $1.00. Isn't that a terrific deal? And it's fun too! I'm still playing with the idea (there are a few kinks to work out) and have made two more since these.

I also made her an invitation to Hogwarts (Harry Potter's wizard school). I copied it from the book and typed it in an appropriate font, soaked the paper in tea to age it then pressed it between heavy books for several days to flatten it. I made the envelope from brown paper and added address labels that I also typed up on my laptop. The wax seal, owl, train ticket & ID card were designs I printed from various places on the internet then glued to stock card and trimmed. This was all made from materials I already had. I was very happy with the results and I left them at her house on two separate days. After some stressful weeks at work she loved them even more!

Total cost for both projects:
2 mugs = $2.00
Hogwarts invitation & extras = $0

Harry Potter references on the front
Fun designs on the back
More fun on the bottom
Front of the envelope I made (delivered by owl, of course)
Back with "wax" seal
Train ticket & Gryffindor ID card
Invitation and school supply list
All the goodies from the envelope

Saturday, January 5, 2013

Saturday Snapshot

 Saturday Snapshot is hosted by At Home with Books. To participate in this meme post a photo that you (or a friend or family member) have taken then leave a direct link to your post in the Mister Linky. Photos can be old or new, and be of any subject as long as they are clean and appropriate for all eyes to see. How much detail you give in the caption is entirely up to you. Please don't post random photos that you find online.
~~~~~~~~~~~~
I love to make things and had so many plans for Christmas. Of course I didn't get to everything that I wanted to make (yet) but I did get to the most important items. Since my ideas came from other sources I thought I would share a few of my results.

I have a friend who is bonkers for Harry Potter. I do love the books myself so it's a fun topic for us. She knows I like to be artistic and crafty when the mood strikes me so she asked me to paint a quote from a book on a switch plate (light switch cover). I had to take it farther than that, of course, and decided to surprise her with a few as well. Instead of painting the quotes I researched some favorite lines, designed the look I wanted then typed and printed them on different colors of scrapbook paper. After I cut them down I attached with Mod Podge and added a few coats on top. I even covered the screws. I sure learned a lot between the first one and the fourth one. What a difference! And she was surprised. Just wait until she sees what's next!
Close up view
Homemade light switch covers with Harry Potter quotes

It's a homemade Golden Snitch ornament! (For the same friend)
A different view on the tree

I made some other fun things too but of course I didn't get to everything I had planned. I made ornaments for my son's girlfriend and the grandkiddos but I forgot to take photos. I have more to make that involve clear glass ornaments and glitter. Pretty!

These are the ones I did remember to photograph - 
The Princess made these coozies for her mommy and daddy!
I saw this idea on Pinterest so I made my own version for grandkiddos and a few other kids.


Saturday, January 21, 2012

Beautiful!

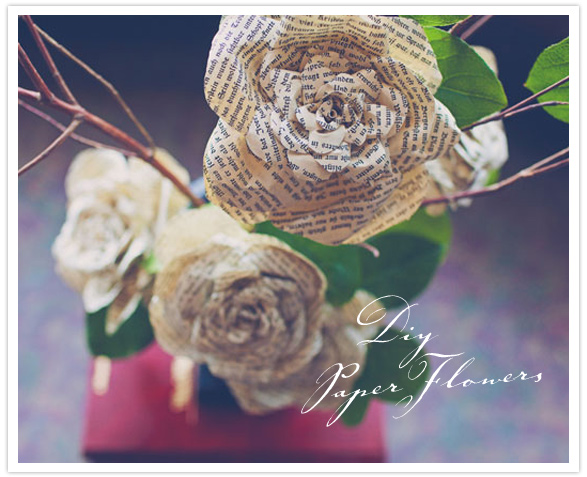
Here is a very clever idea for DIY storybook paper roses from 100 Layer Cake.
I know it's painful to imagine doing that to a book but old sheet music and magazines are also options for making these flower petals. Just click on the link for easy to follow directions!


Thursday, December 1, 2011

Fun Christmas trees!

These great ideas float around every year and I love checking them out, especially the ones that involve books. So clever!  Click the link below to see trees made from other interesting recycled products. 

Postcard, Magazine, Book and Shredded Paper Treespostcards

magazine
paper
(image credits: sparklette, MetalRiot)
These Christmas trees have been created from postcards, magazines, books and even shredded paper. The top gift tree was created by cutting and folding postcards into gift boxes and then layered to form a tree. Too many magazines on your hands? The middle tree was constructed from hundreds of magazine face cutouts, folded and then arranged in a tree shape. If you like white Christmas trees, make use of your shredded papers. Another way to use magazines and books when you are done is to fold them into Christmas tree shapes like on the bottom right.